Table of Contents
Introduction
Compiling toolchains in general can be hard work and complicated. Thankfully as with everything else in life these days there are easier ways to get things done. Here we will look at an “easy” way on how to compile a RISC-V GNU toolchain for Windows with multilib and nano support. We will also be able to select which libraries we want and we will build the “nano” variants of those libraries also.
Requirements
- Ubuntu (I’m running Ubuntu 20.04 on a virtual machine)
- It is easier to build a Windows toolchain on Linux than building a Windows toolchain on Windows, go figure…
And thats all we need to compile a RISC-V GNU Toolchain for Windows.
Prerequisites
First we need to install the prerequisites that Crosstool-NG (Hereafter refered to as ct-ng) needs.
Enter this into the terminal.
sudo apt-get install -y gcc g++ gperf bison flex texinfo help2man make libncurses5-dev python3-dev autoconf automake libtool libtool-bin gawk wget bzip2 xz-utils unzip patch libstdc++6 rsync git mingw-w64Code language: plaintext (plaintext)Next we clone a customized version of Crosstool-NG from Stephanos Ioannidis on Github called zephyr-crosstool-ng. You can use the vanilla Crosstool-NG if you wish, however it will not build the “nano” libraries. All the steps are identical on both. I opted to put the clone inside the “ct-ng” directory because its shorter to type.
git clone --recursive https://github.com/stephanosio/zephyr-crosstool-ng ct-ngCode language: plaintext (plaintext)Enter directory we just cloned.
cd ct-ngCode language: plaintext (plaintext)Checking the contents of the directory we have
ryno@shadowcode-linux:~/Desktop/ct-ng$ ls
bash-completion  configure.ac  ct-ng.in  issue_template.md  licenses.d  Makefile.am  patches      samples  TODO
bootstrap        contrib       debian    kconfig            m4          overlays     paths.sh.in  scripts
config           COPYING       docs      LICENSE            maintainer  packages     README.md    testing
ryno@shadowcode-linux:~/Desktop/ct-ng$
Code language: plaintext (plaintext)
Pre-install configuration
Before we continue we need to add the “Canadian Cross Compilation” configuration to the samples folder.
Inside the /ct-ng/samples directory copy the riscv32-unknown-elf folder.
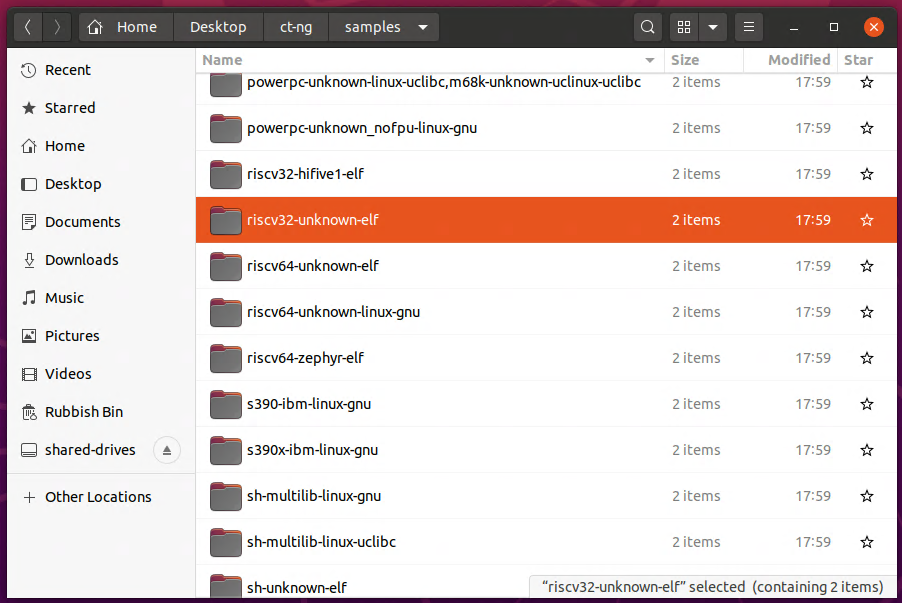
Rename the folder to “x86_64-w64-mingw32,riscv32-unknown-elf”
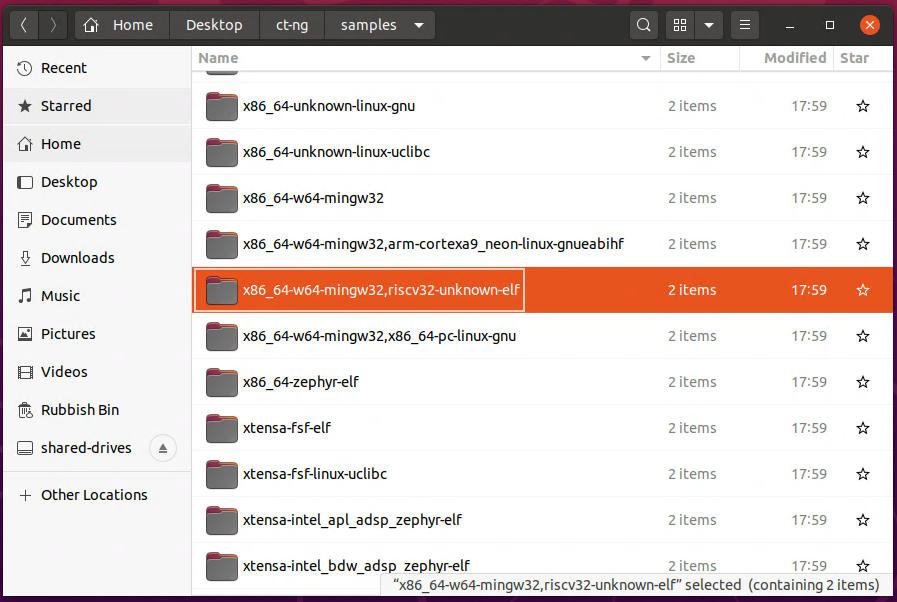
Enter the folder you just created and open the “crosstool.config” file, add the following two lines of text to the bottom of the file.
CT_CANADIAN=y
CT_HOST="x86_64-w64-mingw32"Code language: plaintext (plaintext)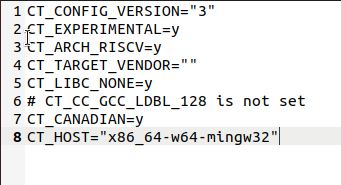
Bootstrap & Configure
Run the bootstrap script next,
./bootstrapCode language: plaintext (plaintext)After this completes run the configure script and optionally supply a folder name where we want ct-ng installed.
./configure --prefix=/home/ryno/Desktop/zt-ngCode language: plaintext (plaintext)I chose to install it to a folder called zt-ng, you need to supply an absolute path if you wish to store it somewhere else.
Run make.
makeCode language: plaintext (plaintext)Then make install.
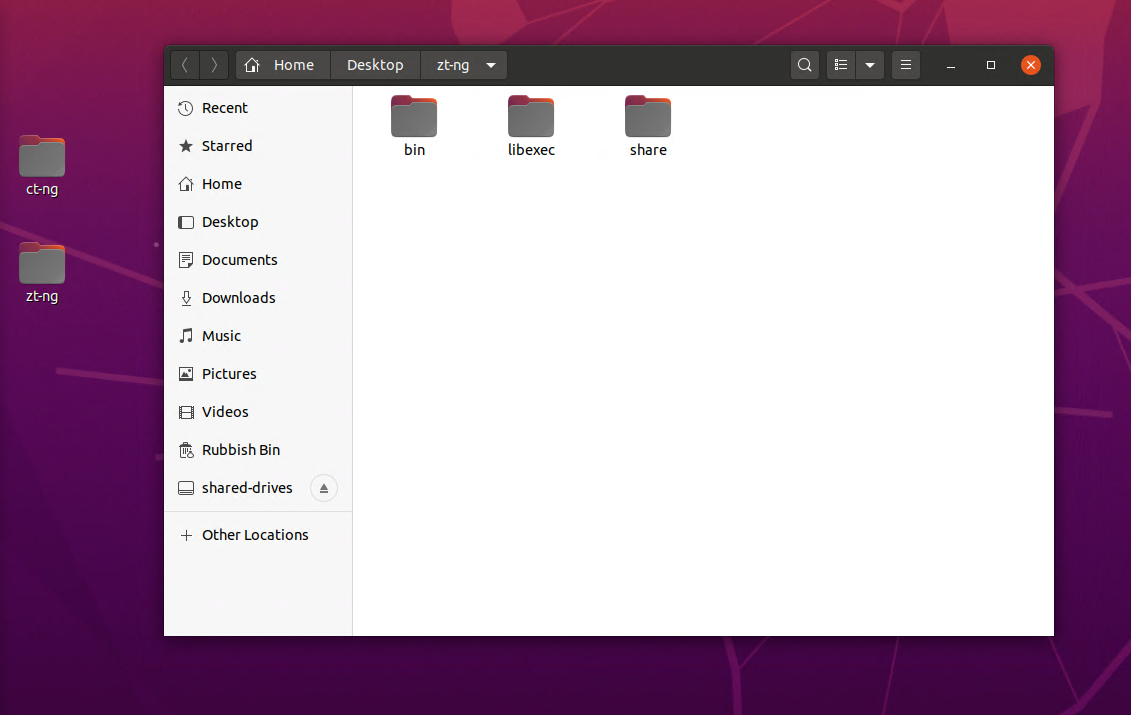
make installCode language: plaintext (plaintext)This is what you should have on your desktop now.
Toolchain Configuration
Enter the “bin” directory we just installed to.
cd ../zt-ng/binNext we will load the configuration script we created earlier.
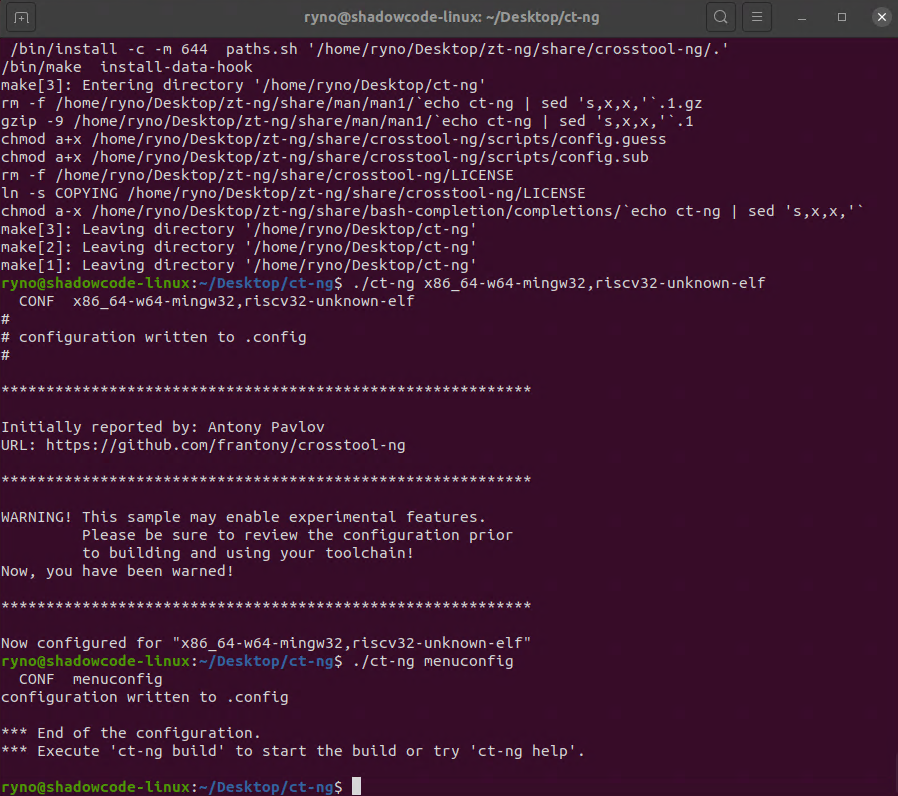
./ct-ng x86_64-w64-mingw32,riscv32-unknown-elf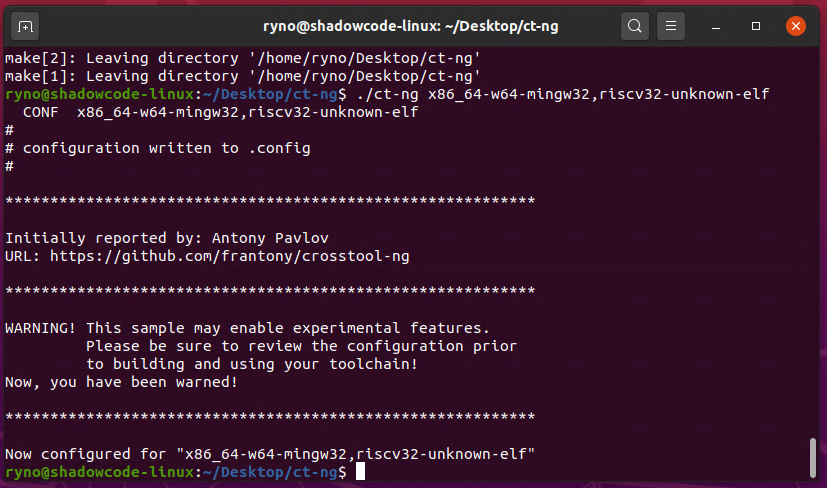
Now enter
./ct-ng menuconfigCode language: plaintext (plaintext)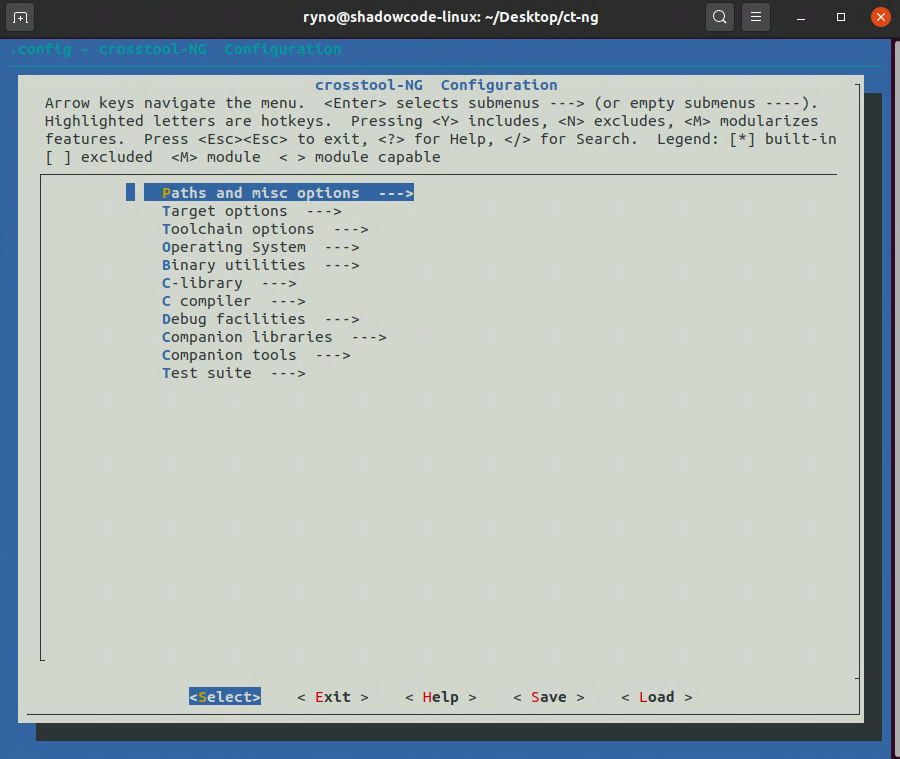
We have several settings to modify now.
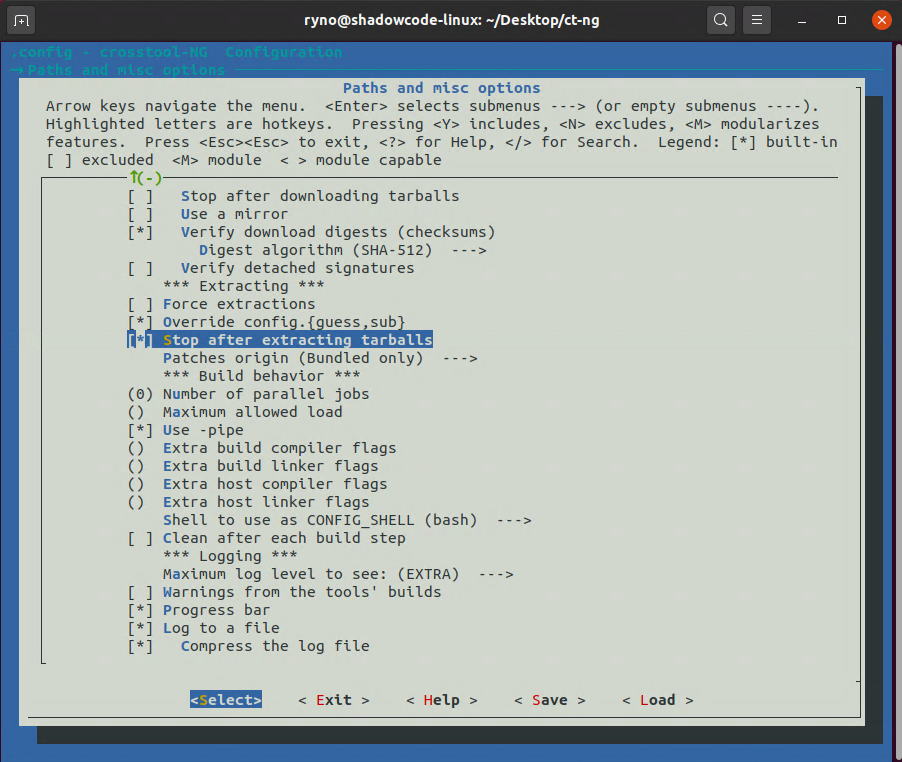
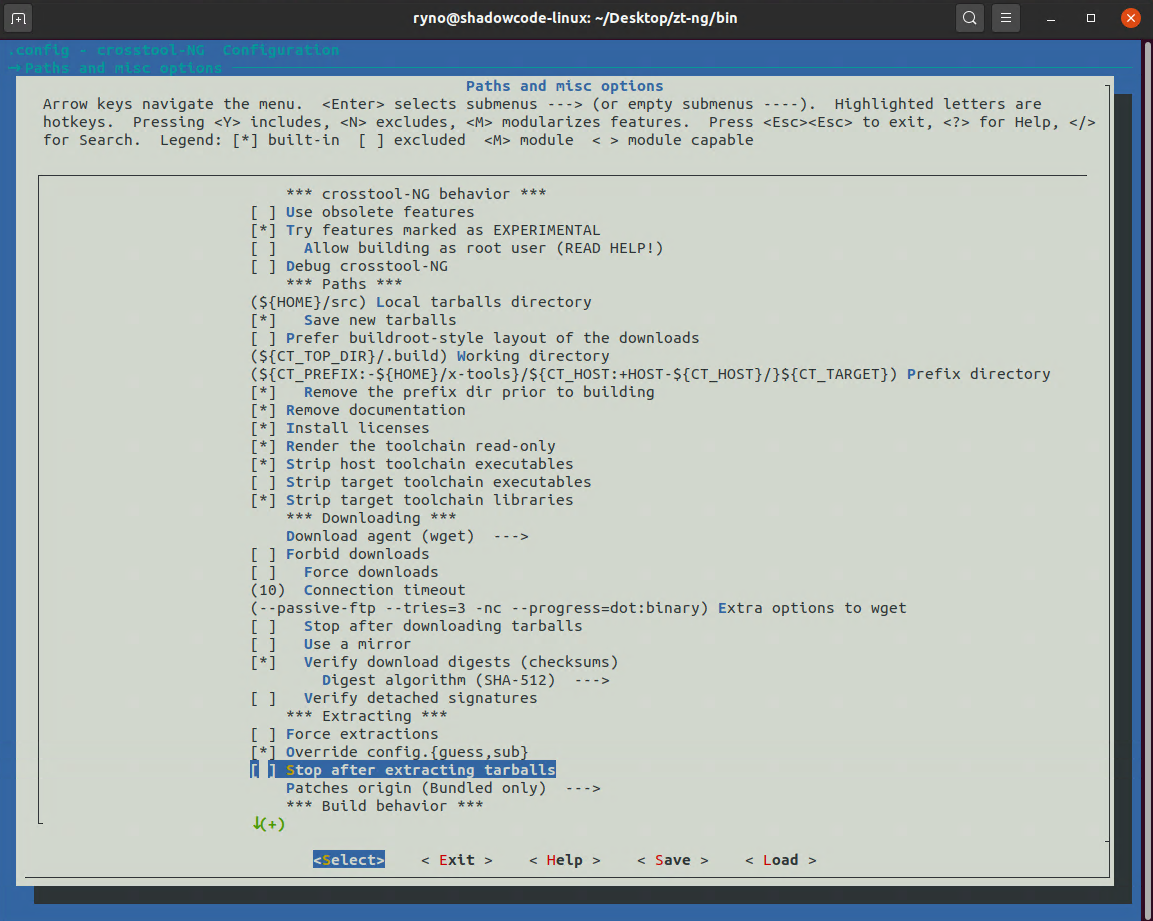
Enter the “Paths and misc options” submenu, scroll down and select “Stop after extracting tarballs”. We do this initially because we need to edit some files in the GCC package that ct-ng downloads. After we have edited those files we will come back here and disable this setting which will allow ct-ng to progress past this point and finish the build process. ct-ng will not re-download or extract the tarballs a second time.
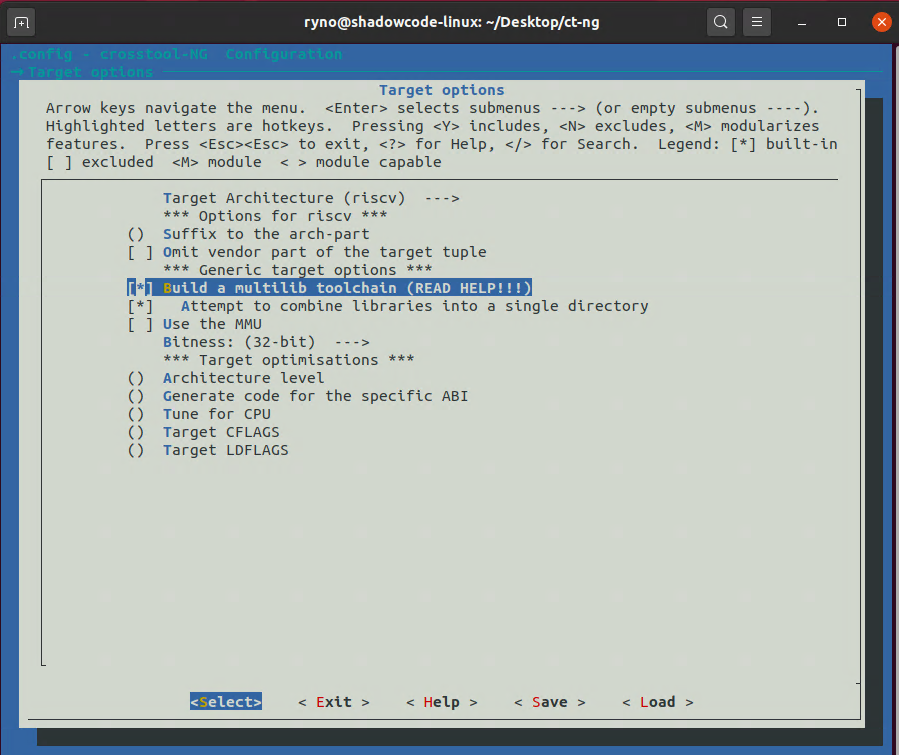
Go back to the main menu and enter the “Target options” submenu. Select “Build a multilib toolchain”.
Go back to the main menu and enter the “C-Library” submenu. Here select “Newlib” as the C library. Several more options will be enabled. Scroll down and select “Enable newlib nano variant” as well.
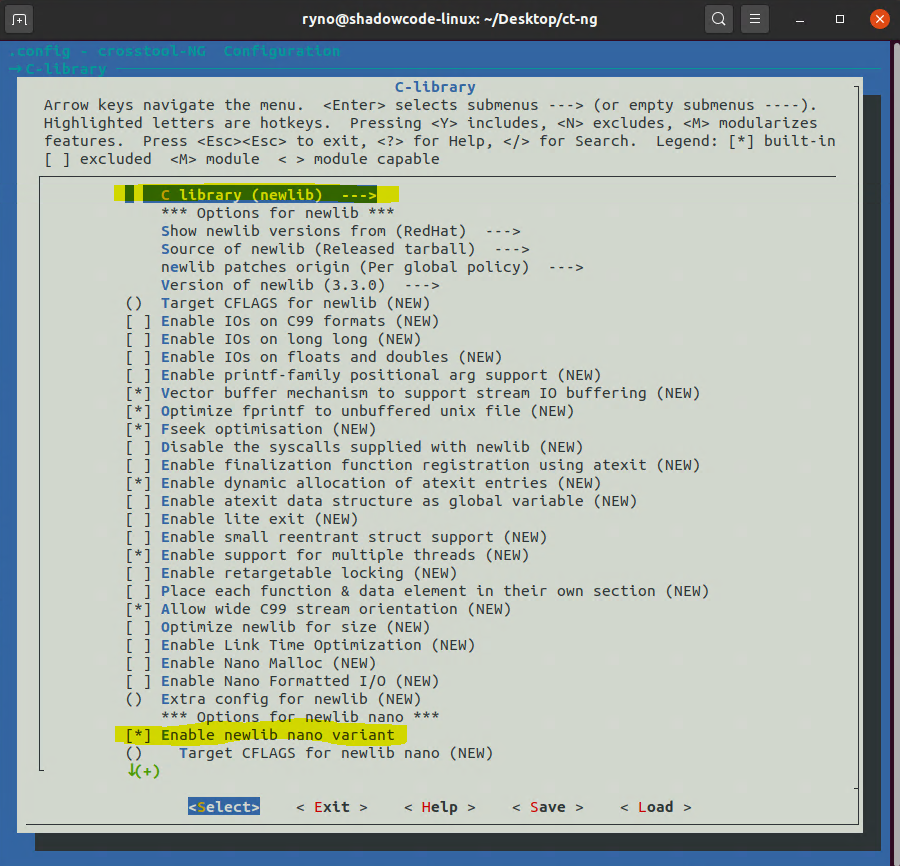
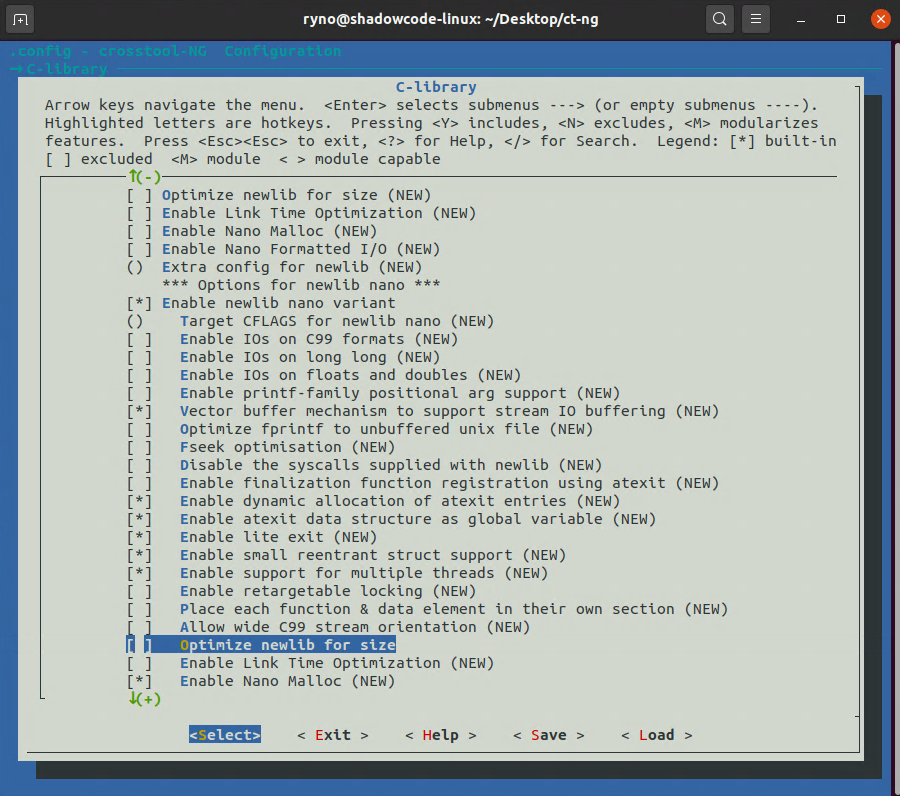
[Optional] Under the options for “Enable Newlib nano variant” deselect the “Optimize newlib for size” option. You can select this option if you wish, however you will need to manually strip the binaries afterwards because that does not happen as part of the size optimizations so you end up with binaries that are actually larger.
If you know what you are doing there are a whole host of settings to tweak on this page.
[Optional] Go back to the main menu and enter the “C Compiler” submenu, scroll to the bottom and select “C++”.

Thats all we need to do for now. Once you are back at the main menu press “Esc” to exit, hit “Enter” to save your configuration file.
Download and extract packages
Enter the following command and wait for ct-ng to download and extract all the packages that it needs. It will stop automatically after extracting the tarballs becauase we enabled that setting earlier in the menu.
./ct-ng buildCode language: plaintext (plaintext)Change GCC multilib options
[Optional] Next we need to tell gcc which multilibs we want. To do this we need to run a python script called “multilib generator” located in the following directory. Note: /.build/ is hidden by default, you need to enable “show hidden files” to see it.
/home/<your name>/Desktop/zt-ng/bin/.build/src/gcc-9.2.0/gcc/config/riscv/
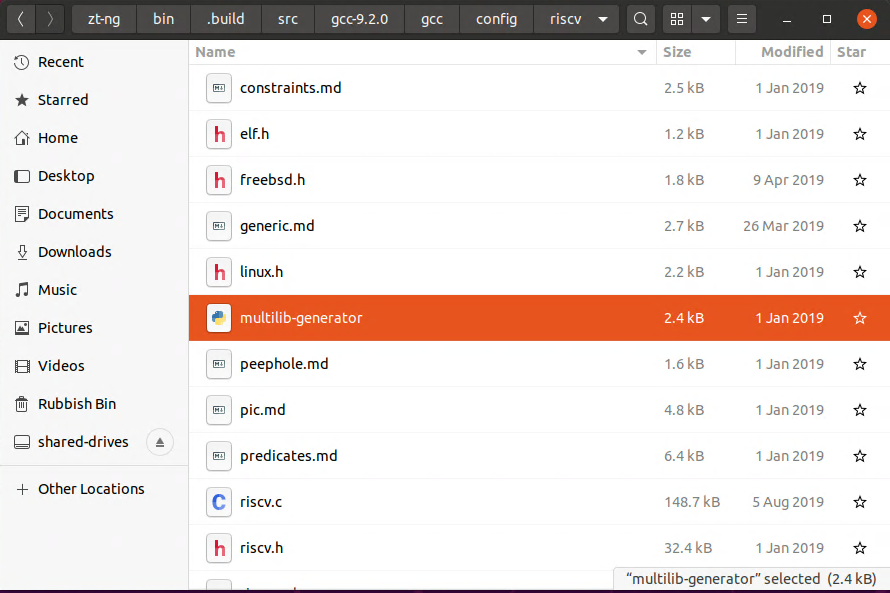
We have to copy the output of this script to a file called “t-elf-multilib” which is in the same directory. More information on this script can be found in the related sifive blog, https://www.sifive.com/blog/all-aboard-part-5-risc-v-multilib.
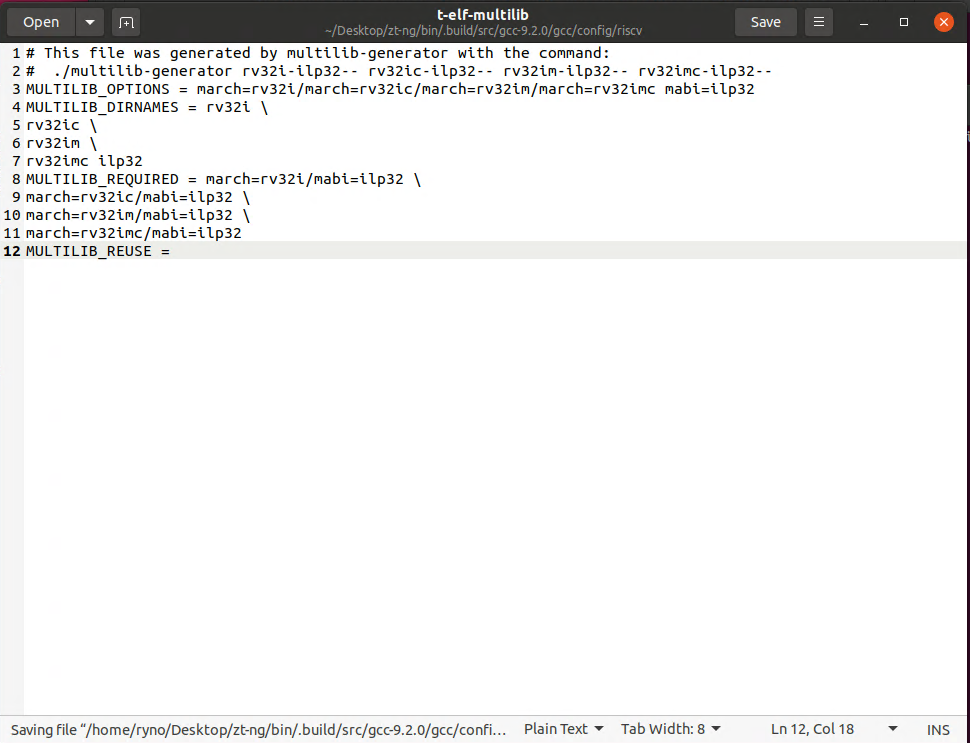
Here is the default contents of the “t-elf-multilib” file.
# This file was generated by multilib-generator with the command:
#  ./multilib-generator rv32i-ilp32--c rv32im-ilp32--c rv32iac-ilp32-- rv32imac-ilp32-- rv32imafc-ilp32f-rv32imafdc- rv64imac-lp64-- rv64imafdc-lp64d--
MULTILIB_OPTIONS = march=rv32i/march=rv32ic/march=rv32im/march=rv32imc/march=rv32iac/march=rv32imac/march=rv32imafc/march=rv32imafdc/march=rv32gc/march=rv64imac/march=rv64imafdc/march=rv64gc mabi=ilp32/mabi=ilp32f/mabi=lp64/mabi=lp64d
MULTILIB_DIRNAMES = rv32i \
rv32ic \
rv32im \
rv32imc \
rv32iac \
rv32imac \
rv32imafc \
rv32imafdc \
rv32gc \
rv64imac \
rv64imafdc \
rv64gc ilp32 \
ilp32f \
lp64 \
lp64d
MULTILIB_REQUIRED = march=rv32i/mabi=ilp32 \
march=rv32im/mabi=ilp32 \
march=rv32iac/mabi=ilp32 \
march=rv32imac/mabi=ilp32 \
march=rv32imafc/mabi=ilp32f \
march=rv64imac/mabi=lp64 \
march=rv64imafdc/mabi=lp64d
MULTILIB_REUSE = march.rv32i/mabi.ilp32=march.rv32ic/mabi.ilp32 \
march.rv32im/mabi.ilp32=march.rv32imc/mabi.ilp32 \
march.rv32imafc/mabi.ilp32f=march.rv32imafdc/mabi.ilp32f \
march.rv32imafc/mabi.ilp32f=march.rv32gc/mabi.ilp32f \
march.rv64imafdc/mabi.lp64d=march.rv64gc/mabi.lp64dCode language: PHP (php)
Eessentially we feed the script with a string that will determine which multilibs gcc will build. The string has the following format,
[arch]-[abi]-[additional arch]-[additional suffix]
- [arch] – The acrhitecture we want a library for.
- [abi] – The abi this arhictecture targets
- [additional arch] – we can specifiy additional architectures here in a comma seperated list that will be linked to this library.
- [suffix] – We can add additional suffix’s that will be linked to this library. eg. ‘c’, ‘d’, ‘a’ etc.
I need libraries to use with a Picorv32 core, which can be configured as either a rv32i, rv32ic, rv32im or rv32imc core. So my configure string will look like this,
./multilib-generator rv32i-ilp32-- rv32ic-ilp32-- rv32im-ilp32-- rv32imc-ilp32--Which can also be expressed like this.
./multilib-generator rv32i-ilp32--c rv32im-ilp32--cYou do not have to change any of this if all the multilibs you require are already part of the default configurations. You also dont have to remove any like I just did, if the one you want is not there you can just add it on. I stripped all the other libs because I wont use them and I wanted to speed up the build time as much as possible.
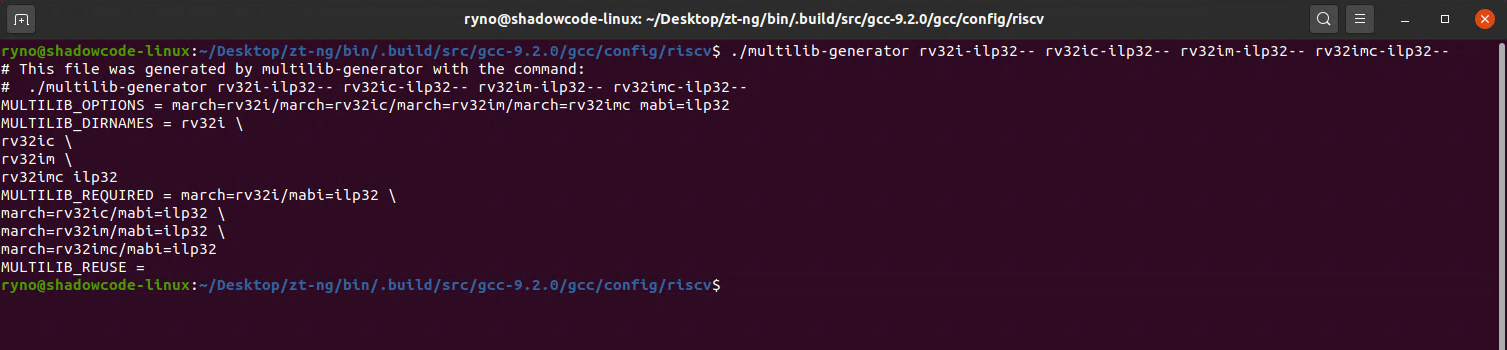
Copy the script output to the “t-elf-multilib” file which is in the same directory and save it.
Building the RISC-V Windows toolchain
OK, we’re all done messing around, now its time to build our RISC-V GNU Toolchain for Windows. Lets go back to the menuconfig again so we can disable the setting to stop the build after extracting the tarballs, this will allow the build to progress as normal and use the mutilib options we just configured for gcc.
Go to the /zt-ng/bin directory and run,
./ct-ng menuconfigUnder the “Paths and misc options” submenu scroll down and de-select “Stop after extracting tarballs”
Exit and hit enter to save the configuration.
Now enter,
./ct-ng buildand wait while crosstool-ng builds your toolchain, this will take a while.
When its done you will have a folder called “x-tools” in the /home/<your name>/ directory. Inside this folder you will find your newly build toolchain.
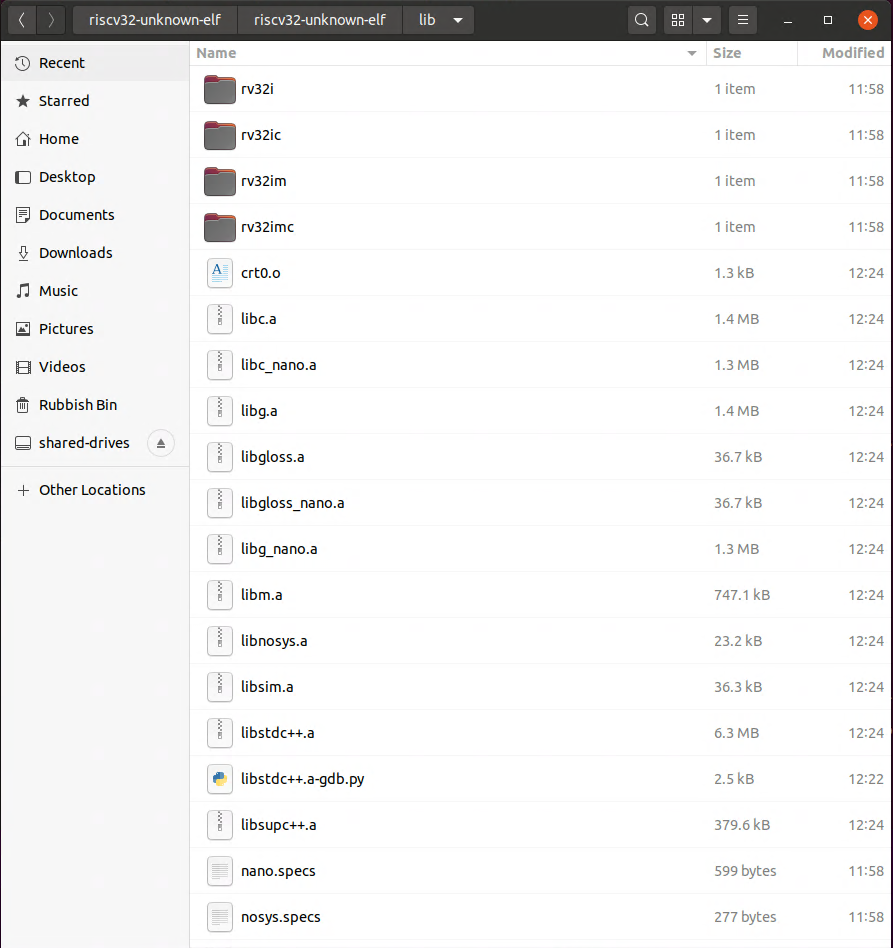
If we look inside the riscv32-unknown-elf/riscv32-unknown-elf/lib directory we can see the libraries we built and the nano variants.
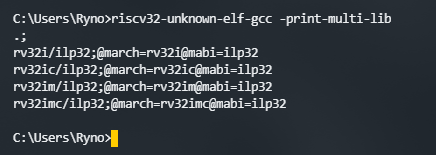
After copying the files over to Windows and adding the path of the “/riscv32-unknown-elf/bin” folder to the “Path” environment variables and running “riscv32-unknown-elf-gcc -print-multi-lib” I get the below output. Success.
Hope you found how to compile a RISC-V GNU toolchain for Windows with multilib and nano support useful. Happy coding.